Home > Uncategorized > How to Read Impact Glove Ratings: Real-World Use
How to Read Impact Glove Ratings: Real-World Use
07 May, 2026
By arafatshuvo509
Impact glove ratings explained simply: ANSI/ISEA 138 rates how much blunt impact force passes through a glove’s back-of-hand protection. Level 1 is basic, Level 2 is mid-range, and Level 3 is highest. Buyers should check whether fingers/thumb and knuckles were both tested, because the final label may hide which zone performed lower.
A glove tag can look simple at first glance. One icon, one number, one safety claim. But for distributors comparing impact gloves, that small label carries a lot of buying risk. The real question is not only “What level is it?” It is “Which part of the hand earned that rating, and does this glove fit the job?” Let’s decode the rating before it becomes a bulk order decision.
What does an ANSI/ISEA 138 impact rating actually tell you?
ANSI/ISEA 138 tells you how well a glove reduces blunt impact force to the knuckles and fingers/thumb during lab testing. It gives a Level 1, 2, or 3 classification so buyers can compare impact protection claims more consistently.
The ANSI impact standard was created for occupational gloves with back-of-hand impact protection. The official ANSI/ISEA 138 standard page describes it as a standard for testing, classifying, and labeling gloves that protect the back of the hand from impact.
That matters because “impact resistant” used to be a loose claim. One supplier could say a glove had TPR protection. Another could show a bulky back-of-hand design. ANSI/ISEA 138 gives buyers a more consistent way to compare how much force passes through the glove during testing.
Still, the rating is not the full buying decision. OSHA’s PPE rule requires hazard assessment first, so the glove must match the work risk, not just the highest number on a tag.
What do Level 1, Level 2, and Level 3 mean in real use?
Level 1 is the lowest ANSI/ISEA 138 impact classification, Level 2 is mid-range, and Level 3 is the highest. The number rises as the allowed transmitted force drops, so Level 3 means less force reaches the hand in testing.
In simple terms, the glove is hit with a controlled impact. The test measures how much force passes through the glove material. Lower transmitted force means better impact energy dispersion, which can help protect the back of the hand from bumps, knocks, and crush-style hazards.
ANSI/ISEA 138 level
What it means for buyers
Typical buying interpretation
Level 1
Basic impact reduction
Useful when impact risk is lighter or occasional
Level 2
Mid-range impact reduction
Common choice for many industrial handling jobs
Level 3
Highest impact reduction
Better for heavier impact hazards, but may add bulk
A higher number is not always the smartest stocking choice. Level 3 works when the hazard is severe. But Level 2 may be the better seller when workers need more dexterity, better grip, and all-day comfort.
Use the rating as the first filter, then check coating, cut level, fit, flexibility, and use case. A good impact glove selection process should balance protection with the work people actually perform.
Which hand zones are tested, and why does the lower score win?
ANSI/ISEA 138 does not let a strong knuckle result cover for weaker finger protection. If one tested zone performs lower, that weaker result controls the glove’s overall impact rating.
This is the detail many buyers miss. ANSI/ISEA 138 looks at more than the main knuckle area. It includes testing on knuckles and fingers/thumb, which matters because real impact injuries do not always hit the same part of the hand.
The HexArmor guide to ISEA impact testing explains that the final glove score is based on the lower-performing area. That rule helps prevent a glove from earning a strong overall label because one zone performed well.
Example: when knuckles test higher than fingers
Imagine a glove sample with thick TPR over the knuckles but thinner protection over the fingers. The knuckle area may perform like Level 3, but the fingers may perform like Level 2. In that case, the glove should not be treated as full Level 3 protection.
That is why a single “Level 2” mark can hide useful detail. It may mean both areas performed at Level 2. It may also mean one area tested higher, but the lower result controlled the final label. For distributors buying cut impact gloves, that difference affects how the glove should be positioned.
Knuckle, metacarpal, finger, and thumb protection: what should buyers look for?
Buyers should look beyond the raised TPR pattern and check which zones are actually protected. A large back-of-hand design can look strong, but the label and test report matter more than how aggressive the glove looks.
“Knuckle” usually refers to the raised joints across the back of the hand. “Finger” and “thumb” are more specific. “Metacarpal” is often used in product language for the broader back-of-hand area between the wrist and fingers. These terms can overlap in marketing, so buyers should inspect the glove carefully.
Glove area
What buyers should check
Why it matters
Knuckles
TPR thickness, spacing, flexibility
Main impact zone on many industrial gloves
Fingers
Coverage over each finger segment
Fingers often face pinch and strike hazards
Thumb
Side and top coverage
Thumb gaps are easy to miss on samples
Metacarpal area
Back-of-hand layout between knuckles and wrist
Helps buyers judge broader dorsal coverage
Finger joints
Flex points between TPR blocks
Large gaps can improve movement but reduce coverage
For heavy industry, this inspection becomes even more important. A glove sold for mining, drilling, or rig work needs more than a bold back-of-hand look. Buyers comparing oilfield impact gloves should ask how the TPR layout supports the exact hazard.
Is EN 388 “P” the same as ANSI/ISEA 138 Level 1, 2, or 3?
EN 388 “P” is not the same as ANSI/ISEA 138 Level 1, 2, or 3. EN 388 gives a pass/fail style impact mark, while ANSI/ISEA 138 gives graded levels and includes finger/thumb testing.
This is a common comparison problem. A European-style glove may show EN 388 markings with a “P” for impact protection. That does not convert directly into ANSI/ISEA 138 Level 1, 2, or 3.
The uvex comparison of EN 388 and ISEA 138 explains that EN 388 and ANSI/ISEA 138 handle impact protection differently. ANSI/ISEA 138 gives a graded level system and includes finger/thumb testing, which makes it more useful for comparing impact performance in detail.
Marking
What it tells you
What it does not tell you
EN 388 P
The glove passed the EN impact test
It does not equal ANSI Level 1, 2, or 3
EN 388 F
The glove failed the impact test
It does not explain ANSI performance
EN 388 X
Impact test was not performed or not applicable
It does not prove impact protection
ANSI/ISEA 138 Level 1-3
Graded impact classification
It does not prove grip, cut resistance, or comfort
If a sample shows only EN 388 “P,” do not list it as ANSI Level 2 without an ANSI/ISEA 138 report. For deeper standard detail, link the buyer to the ISEA 138 guide.
How do you read an impact glove tag at a trade show?
Read the tag in this order: standard name, impact level, cut rating, test report match, and SKU match. Do not treat the impact level as proof of grip, cut resistance, coating durability, or full back-of-hand coverage.
At a trade show, buyers often compare gloves quickly. The sample may look strong, but the tag must match the claim. Start with the standard name, then check whether the glove shows ANSI/ISEA 138 and the impact level.
Then slow down. Ask the supplier whether the knuckle and finger/thumb results were the same. Ask if the report applies to that exact color, model, and TPR layout. A report for a black glove may not cover an orange version with a different design.
Label-decoder graphic: what each mark means
Use this as the content plan for a simple label-decoder graphic inside the article.
Label item
What to look for
Buyer action
ANSI/ISEA 138 icon
Confirms impact standard claim
Ask for test report
Impact level
Level 1, 2, or 3
Match level to hazard
Finger/thumb result
Separate tested zone
Ask if it differs from knuckles
Knuckle result
Main back-of-hand zone
Check if it pulled rating up or down
Cut rating
ANSI cut level or EN cut mark
Match to sharp-edge risk
EN 388 mark
Includes abrasion, cut, tear, puncture, and possible impact mark
Do not convert “P” into ANSI level
Product SKU
Exact item code
Match tag to report
Coating
Nitrile, sandy nitrile, PU, latex, or other
Match grip to work surface
Size range
Available sizes
Check worker fit and distributor range
MOQ/customization
Order terms and branding options
Confirm before quoting customers
This is where buying impact gloves becomes practical. The buyer is not only reading a standard. They are checking whether a real sample can be sold with confidence.
How should a distributor compare two gloves with the same impact level?
Two Level 2 gloves can still differ in comfort, grip, TPR layout, cut resistance, and supplier documentation. Use the impact rating as the first filter, then compare the glove design against the actual work hazard.
A Level 2 mark does not make two gloves equal. One glove may have better oil grip, a higher cut rating, and a cleaner test report. Another may have a thicker TPR pattern but poor flexibility. For distributors, that difference affects returns, repeat orders, and customer trust.
Use the rating to narrow the list. Then compare the full glove. OSHA’s PPE rules point back to hazard assessment, so the glove must fit the risk, not only the label. For broader cut, coating, and material selection, send readers to the cut glove buying guide.
Comparison point
Glove A
Glove B
Why it matters
Buyer action
ANSI impact level
Level 2
Level 2
Same headline rating
Move to deeper checks
Finger/thumb vs knuckle result
Supplier provides details
Supplier only gives final level
Shows report transparency
Ask for zone detail
TPR layout
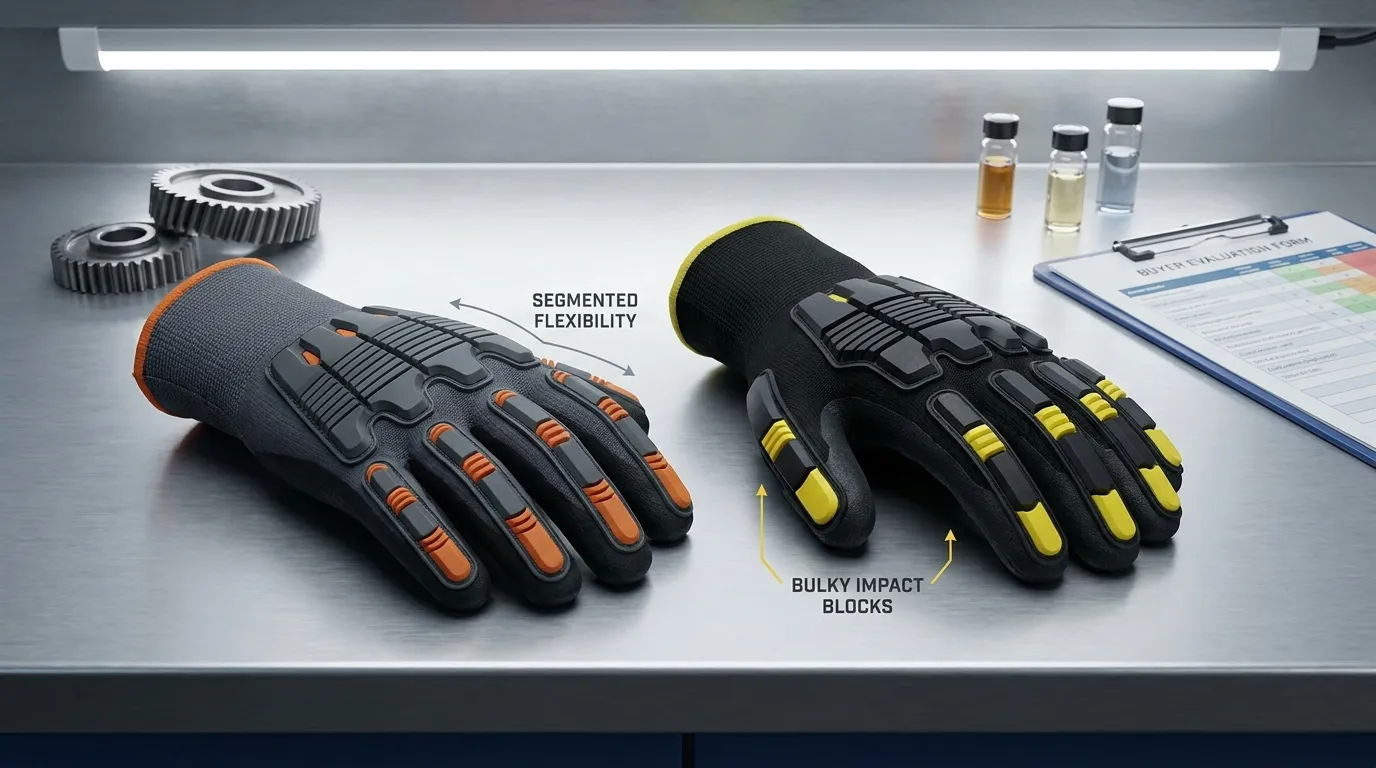
Segmented and flexible
Large blocks
Affects movement
Test hand closure
Metacarpal coverage
Broad back-of-hand coverage
Knuckle-heavy design
Changes real-world coverage
Inspect gaps
Cut level
Higher cut rating
Lower cut rating
Matters near sharp metal
Match to customer hazard
Palm coating
Sandy nitrile
Smooth coating
Affects oily grip
Test with oily parts
Dexterity
Easier finger movement
Stiffer feel
Affects worker adoption
Run sample trial
Grip in oil
Stronger wet grip
Slips on oily metal
Key in metal and energy work
Prioritize work condition
Size range
Full range
Limited sizes
Fit affects safety
Confirm stock sizes
Test report availability
Report matches SKU
Report unclear
Reduces claim risk
Verify before order
A practical example: two gloves both claim Level 2. One has sandy nitrile coating, A5 cut resistance, and clear finger/thumb test details. The other looks tougher but feels stiff and lacks a matching report. For oily metal handling, the first glove may be the safer product to stock.
What supplier questions should you ask before placing a bulk order?
Ask direct questions before you commit to a bulk order. A good supplier should be able to explain the rating, match the report to the SKU, and help you confirm that the glove fits the target application.
Use this checklist when comparing samples from different manufacturers.
Can you provide the ANSI/ISEA 138 test report or certificate?
Does the report match this exact SKU, color, and TPR layout?
Did the fingers/thumb and knuckles achieve the same level?
If not, which zone controlled the final rating?
What ANSI cut level does this glove carry?
What palm coating is used?
Is the coating suitable for oil, dry handling, or wet grip?
What sizes are available?
What is the MOQ for standard and custom branding?
Can you provide samples for dexterity and grip testing?
Does customization change the rating or require a separate confirmation?
For dual hazards, the rating conversation should include both impact and cut risk. If the customer handles sharp parts and faces back-of-hand impact, guide them toward dual-protection gloves instead of treating impact level alone as the full answer.
What to Do Next
Impact glove ratings explained the right way should lead to better buying questions, not just a higher number on a product page. Start with ANSI/ISEA 138 Level 1, 2, or 3. Then check the tested zones, the exact SKU, the coating, the cut level, and the supplier’s documentation.
For a distributor, the best glove is the one that matches the hazard and can be explained clearly to the customer. Ask for reports, inspect the sample, compare real work conditions, and choose the glove that workers will actually wear.
Frequently Asked Questions
What does ANSI/ISEA 138 mean on gloves?
ANSI/ISEA 138 means the glove has been rated for back-of-hand impact protection. It measures how well the glove reduces impact force to the knuckles and fingers/thumb during lab testing.
Is ANSI impact Level 3 better than Level 2?
Yes, Level 3 is the highest impact classification under ANSI/ISEA 138. But buyers should still check dexterity, grip, coating, and the actual work hazard before choosing the highest level.
Are fingers tested in ANSI/ISEA 138?
Yes, ANSI/ISEA 138 tests fingers/thumb as well as knuckles. This is one reason it gives more detailed impact information than EN 388’s impact marking.
Why can one weak area lower the whole glove rating?
The overall impact rating uses the lower-performing tested area so the label does not overstate protection. If fingers perform lower than knuckles, the final glove rating follows the weaker result.
Is EN 388 P equal to ANSI/ISEA 138 Level 2?
No, EN 388 P is not equal to ANSI/ISEA 138 Level 2. EN 388 uses a pass/fail style impact mark, while ANSI/ISEA 138 uses three graded performance levels.
Can two Level 2 impact gloves perform differently?
Yes, two Level 2 gloves can still differ in TPR layout, coating, cut level, fit, flexibility, and supplier documentation. The impact level is important, but it is not the whole buying decision.